Navigating the world of mass communication can feel daunting, especially when personalization is key to making an impact. Whether you're sending out event invitations, client updates, or promotional letters, a generic message often falls flat. This is where mastering the mail merge feature in older but still widely used software becomes a powerful skill. For those using a classic version of Microsoft's suite, understanding How To Create A Mail Merge Template In Word 2010 is a game-changer, transforming a tedious task into a streamlined, efficient process that produces customized documents for every recipient on your list.
At its core, a mail merge is a powerful tool designed to automatically create multiple documents from a single template and a structured data source. Imagine you have a list of one hundred clients in a spreadsheet. Instead of manually copying and pasting each client's name, address, and other details into a letter one hundred times, a mail merge does it for you. It pulls the information from your data source and inserts it into designated placeholders within your Word document, generating a unique, personalized version for each individual.

Creating a template is the most crucial part of this process. A well-designed mail merge template is a reusable asset. Once created, you can use it repeatedly with different or updated data lists, saving you countless hours in the future. It ensures consistency in your branding and messaging while still allowing for the high level of personalization that makes your communication feel direct and thoughtful. This guide will walk you through every step, from preparing your data to saving a reusable template, ensuring you can leverage this feature to its full potential.
This comprehensive tutorial is specifically tailored for users of Word 2010. While the fundamental principles of mail merge remain consistent across different versions of Word, the user interface, specific menu locations, and available options can vary. We will focus precisely on the "Mailings" tab and the step-by-step wizard found in the 2010 interface, providing clear, actionable instructions that will empower you to create everything from personalized letters and emails to envelopes and labels with confidence and ease.
Understanding the Core Components of a Mail Merge
Before diving into the creation process, it's essential to understand the three fundamental components that work together to make a mail merge successful. Grasping how these elements interact will make troubleshooting easier and help you build more complex and effective campaigns.

The Main Document (Your Template)
The main document is the file you create in Microsoft Word. This is your template. It contains the static text and graphics that will be the same for every version of the merged document. For example, it would include the body of your letter, your company logo, and your signature.
Crucially, the main document also contains merge fields. These are special placeholders that tell Word where to insert the unique information from your data source. A merge field looks something like <<FirstName>> or <<Address>>. When you run the mail merge, Word replaces these placeholders with the actual data (e.g., "John" and "123 Main Street") from your recipient list. This is the element that makes each document personalized.

The Data Source (Your Recipient List)
The data source is a file that contains all the variable information you want to include in your main document. This is your recipient list. While you can use various types of files, the most common and versatile data source is a Microsoft Excel spreadsheet.
An effective data source is well-organized. Each column represents a specific category of information, such as FirstName, LastName, StreetAddress, City, PostalCode, or EmailAddress. Each row corresponds to a single recipient, containing all their specific details. The clarity and accuracy of your data source are paramount; any errors or inconsistencies in this file will be reflected in your final merged documents.

The Merged Document
The merged document is the final output of the mail merge process. It is the result of combining your main document (template) with your data source. You have the option to generate this output in several ways:
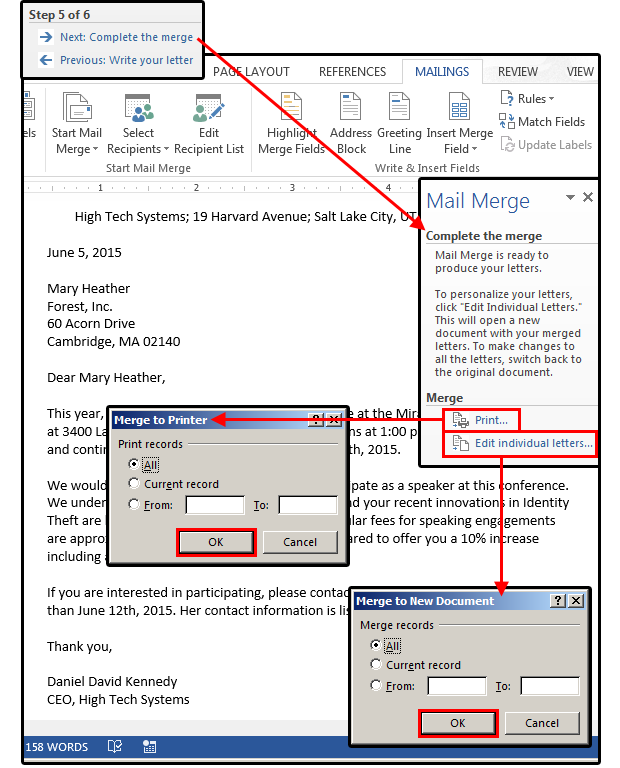
- Edit Individual Documents: This creates a new, single Word document that contains all the personalized letters, one after another, separated by page breaks. This is perfect for reviewing each letter before printing.
- Print Documents: This sends the merged documents directly to your printer without creating a new file.
- Send Email Messages: If your mail merge is for an email campaign, this option will send each personalized message directly to the email addresses specified in your data source, using Microsoft Outlook.
Preparing Your Data Source: The Foundation of Your Merge
A successful mail merge begins long before you open Word. The quality and organization of your data source, typically an Excel spreadsheet, will dictate the success of the entire operation. A poorly prepared data source can lead to errors, incorrect information, and a lot of frustration.
Best Practices for Your Excel Spreadsheet
Follow these guidelines to ensure your Excel file is ready for a smooth mail merge:
- Use Clear Column Headers: The first row of your spreadsheet should contain the column headers. These headers should be short, descriptive, and contain no spaces or special characters (e.g., use FirstName instead of "First Name"). These headers will become the names of your merge fields in Word.
- One Record Per Row: Each row after the header row should represent a single recipient or record. Do not leave empty rows between records.
- Consistent Formatting: Ensure data within a column is formatted consistently. For example, all zip codes in the PostalCode column should be formatted as text to preserve leading zeros. All dates should be in the same format.
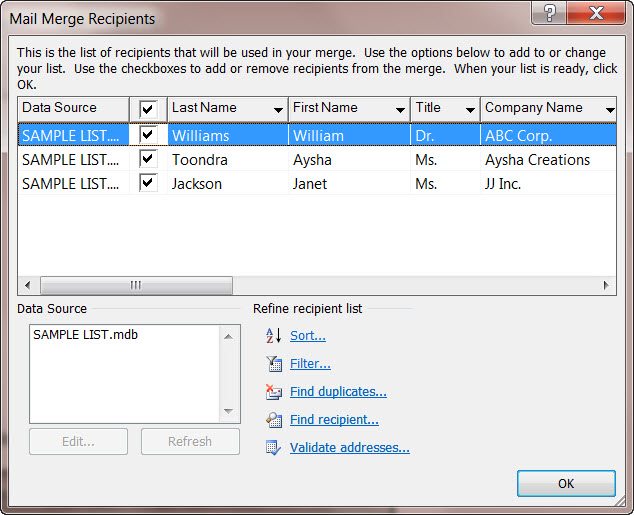
- Separate Data Logically: Break down information into its smallest useful parts. For instance, instead of one column for "Name," create separate columns for Title, FirstName, and LastName. This gives you more flexibility in your Word template (e.g., addressing someone as "Dear Mr. Smith").
- Single Sheet: Ideally, your data should be on the first sheet of the Excel workbook. Word can pull data from other sheets, but it's simplest to keep it on "Sheet1".
- Save and Close: Before you start the mail merge process in Word, make sure your Excel file is saved and, most importantly, closed. Word cannot properly access the data if the file is open in Excel.
Step-by-Step Guide: How To Create A Mail Merge Template In Word 2010
With your data source prepared and closed, you are now ready to begin creating your template in Word 2010. The Mail Merge Wizard is an excellent tool for guiding you through the process.
Starting the Mail Merge Wizard
The easiest way to perform a mail merge is by using the built-in wizard.
- Open a new, blank document in Microsoft Word 2010.
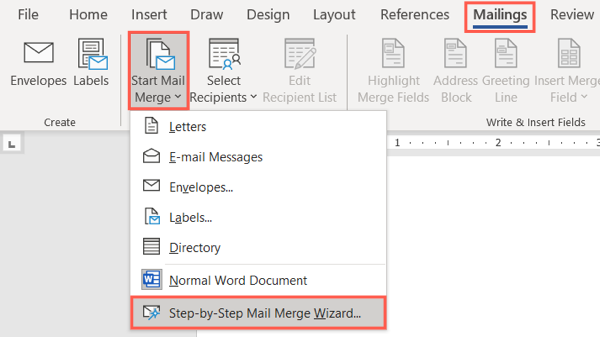
- Navigate to the Mailings tab on the Ribbon at the top of the screen.
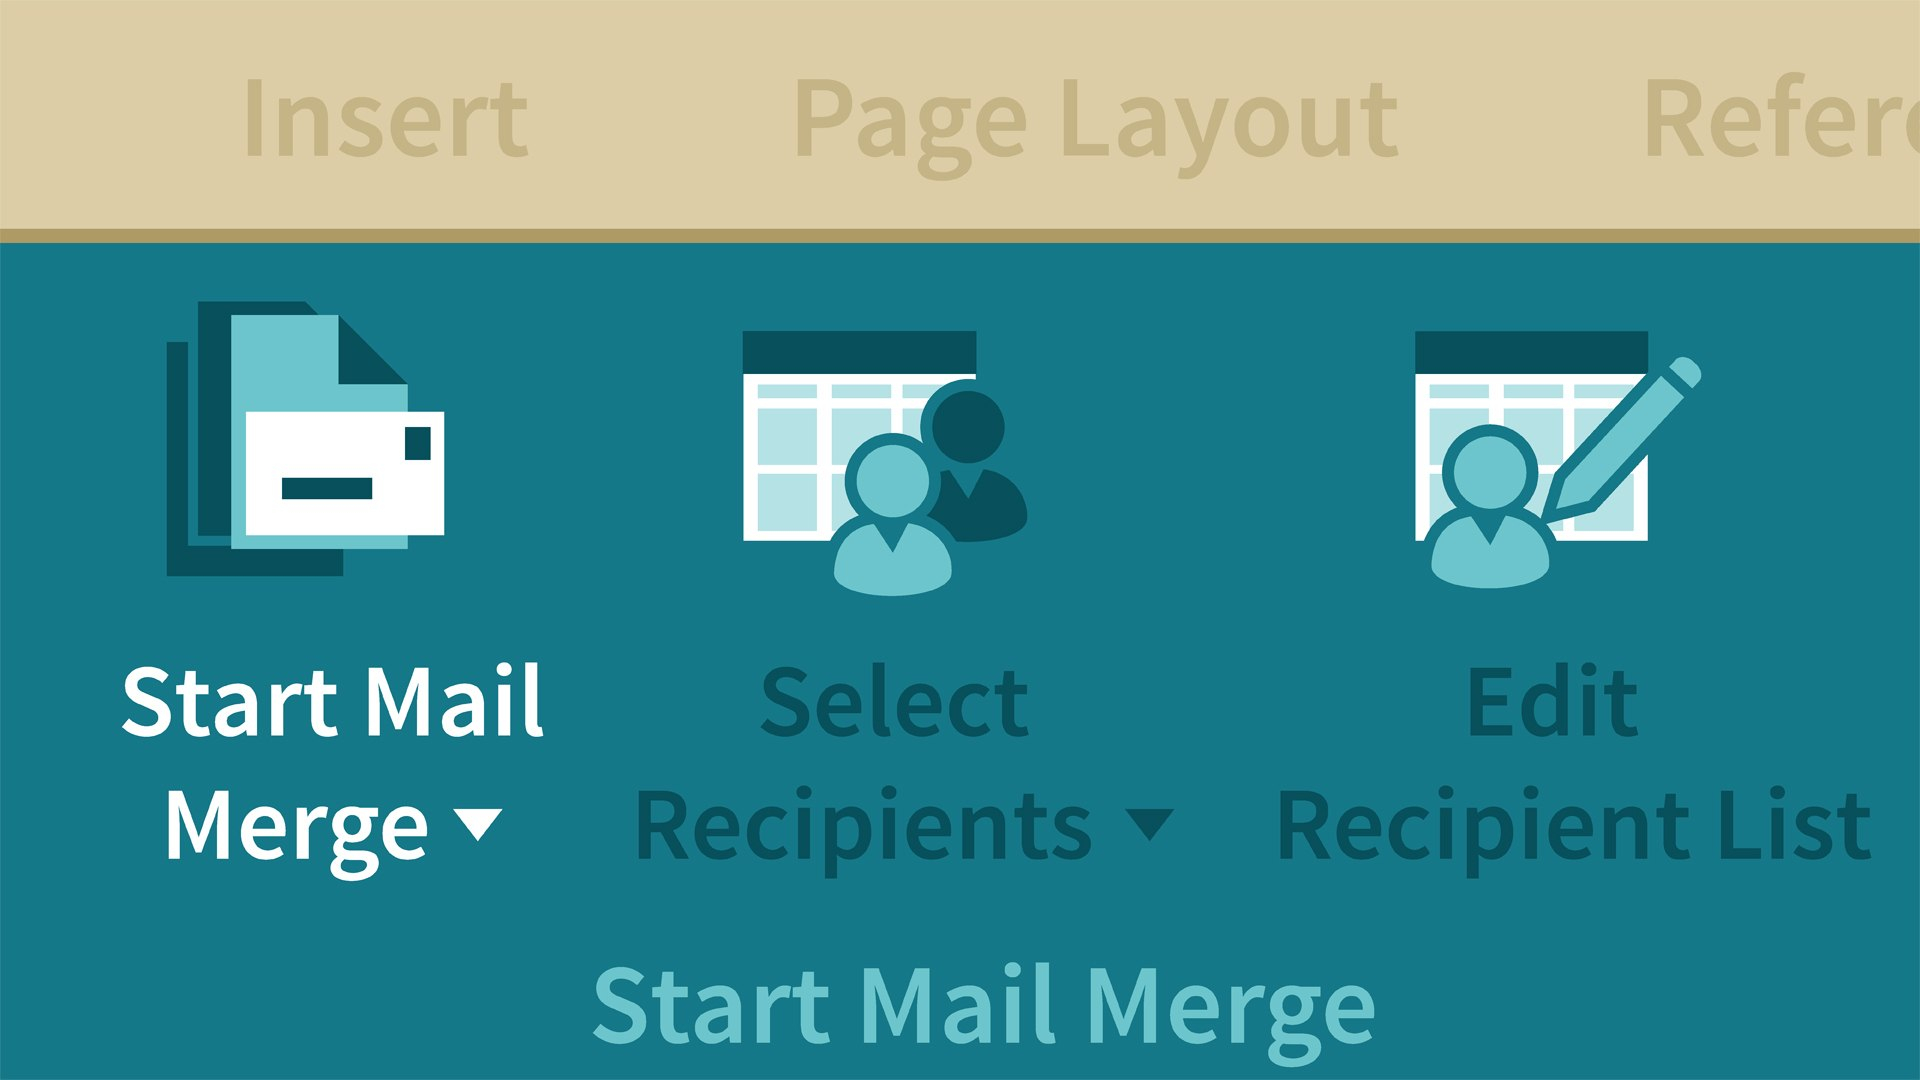
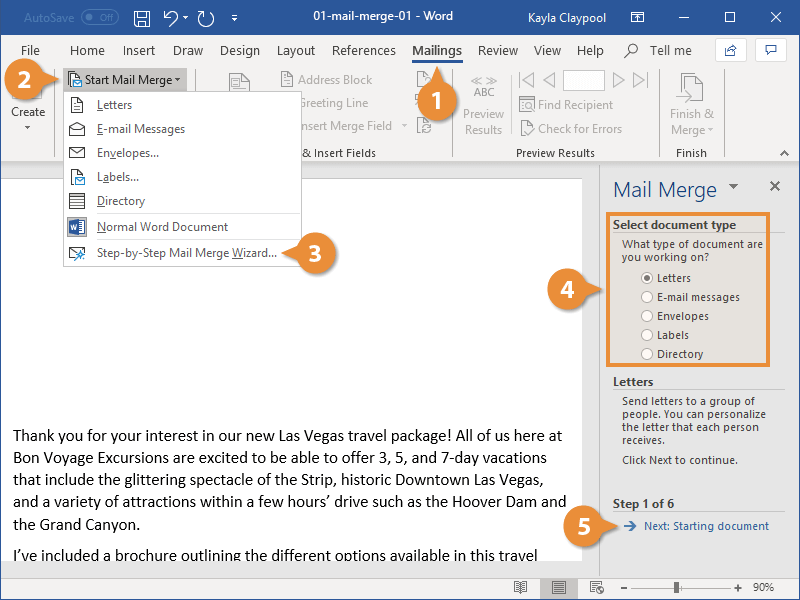
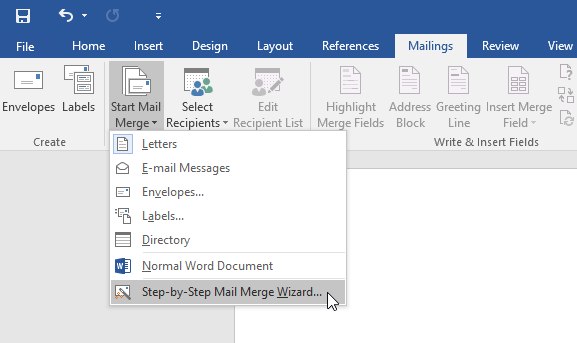
- In the "Start Mail Merge" group, click on Start Mail Merge.
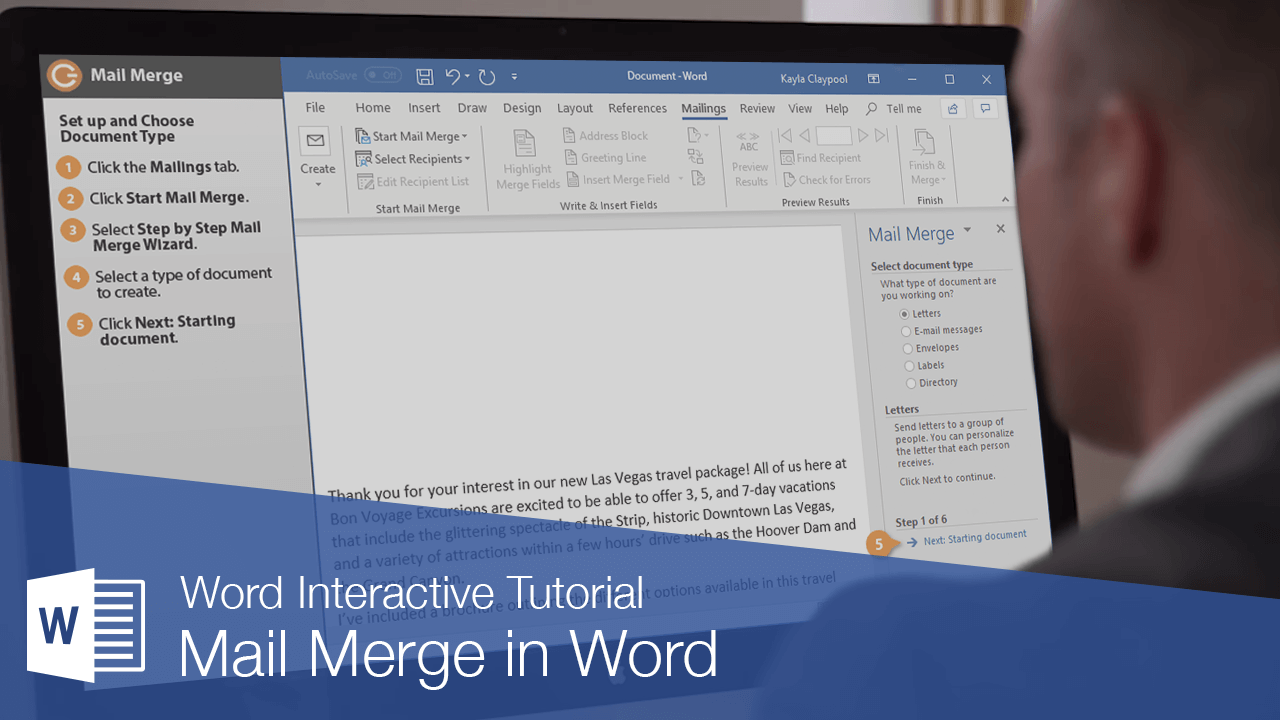
- From the dropdown menu, select Step by Step Mail Merge Wizard.... This will open a task pane on the right side of your screen that will guide you through the six steps.
Selecting Your Document Type
The first step in the wizard is to choose the type of document you are creating. Your options include:

- Letters: The most common option for creating standard printed letters.
- Email messages: For sending personalized emails directly from Word via Outlook.
- Envelopes: For printing addresses directly onto envelopes.
- Labels: For creating sheets of mailing labels.
- Directory: For creating a single document that lists records from your data source, like a membership directory.
For this guide, we will select Letters. After making your selection, click Next: Starting document at the bottom of the task pane.
Creating or Selecting the Main Document
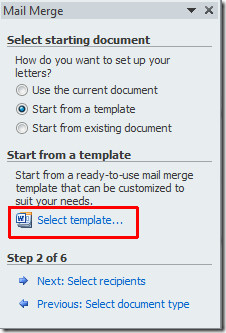
In Step 2, you'll decide on the main document to use as your template.
- Use the current document: This is the most common choice. You will type your letter directly into the blank document you already have open.
- Start from a template: You can choose from one of Word's pre-built templates.
- Start from existing document: You can open a letter you have already written and saved previously.
Select Use the current document and begin typing the static content of your letter. Write the full text, leaving spaces where you want to insert personalized information. For example:
[Your Company Logo]
[Your Company Address]

[Date]
<
Dear <
This is the main body of your letter. We are writing to you today about...
Do not type the << >> fields yet. Just leave space for them for now. Once your letter is drafted, click Next: Select recipients.
Connecting to Your Data Source
In Step 3, you will connect your Word document to your recipient list.
- Ensure the Use an existing list option is selected.
- Click the Browse... link.
- A file explorer window will open. Navigate to the location where you saved your prepared Excel spreadsheet, select it, and click Open.
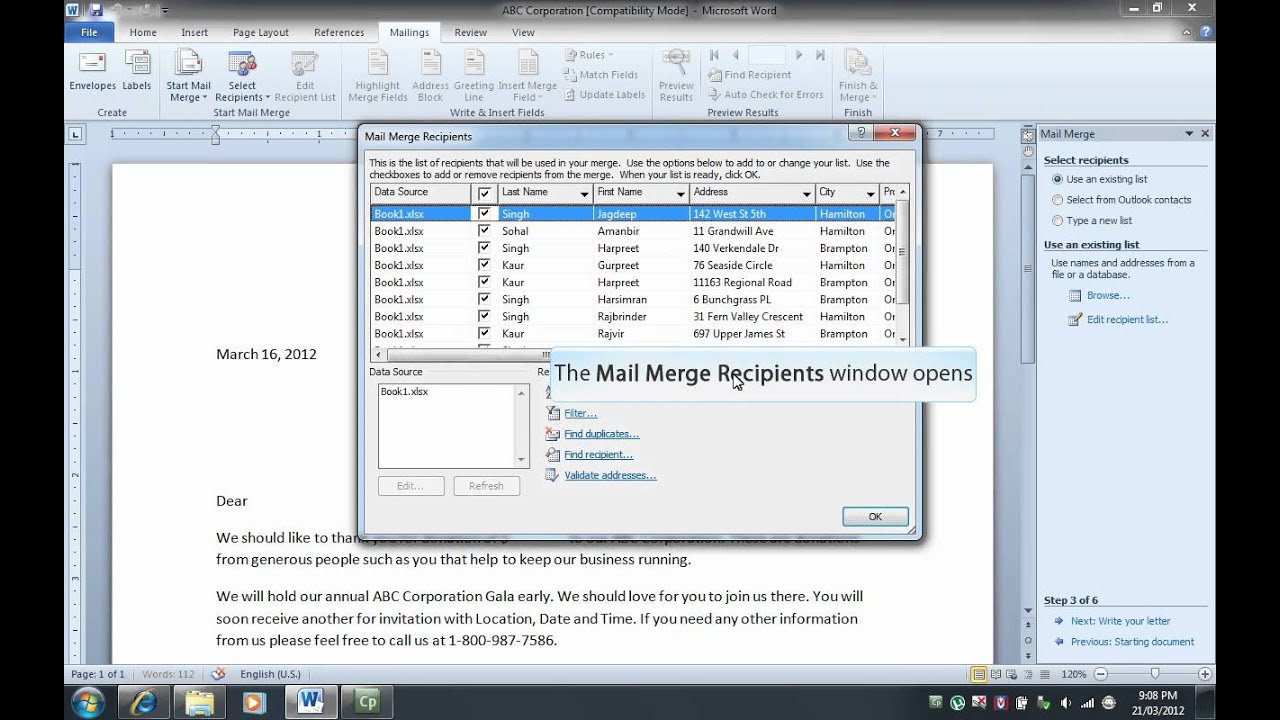
- A "Select Table" dialog box will appear. It will likely show "Sheet1$" or the name of the worksheet containing your data. Ensure the box for First row of data contains column headers is checked. This is crucial. Click OK.
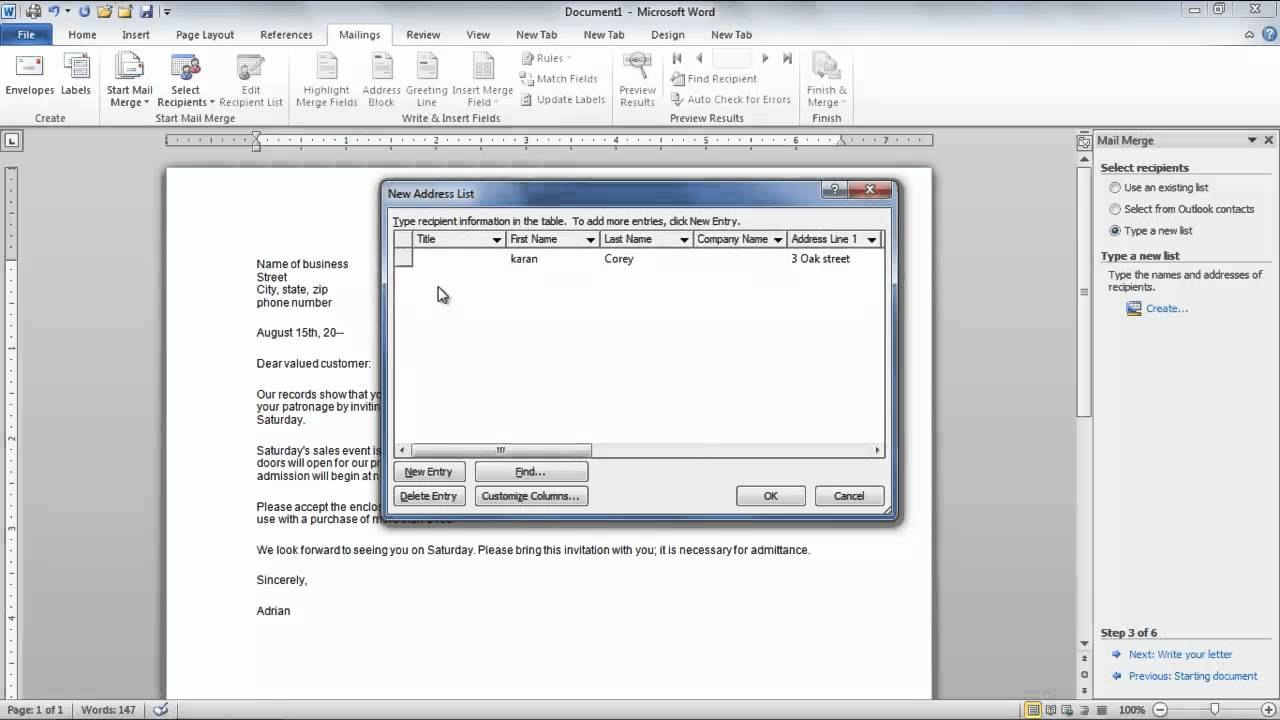
- The "Mail Merge Recipients" dialog box will now appear. This shows you all the data from your spreadsheet. Here, you can sort, filter, or uncheck specific recipients you wish to exclude from this particular merge. For now, you can review it and click OK.
Your Word document is now linked to your data source. Click Next: Write your letter.
Inserting Merge Fields
This is the most critical step where you turn your static letter into a dynamic template.
- In your Word document, place your cursor exactly where you want to insert a piece of personalized information. For example, click your cursor in the space where the recipient's name should go.
- In the Mail Merge task pane on the right, you will see several options. Click on More items.... Alternatively, on the Mailings tab in the Ribbon, you can click Insert Merge Field.
- The "Insert Merge Field" dialog box will pop up, listing all the column headers from your Excel file (e.g., FirstName, LastName, City).
- Select the field you want to insert (e.g., FirstName) and click Insert.
- Repeat this process for all the placeholders in your document. Add spaces and punctuation between fields as needed. Your address block might look like this after insertion:
<<Title>> <<FirstName>> <<LastName>>.
A very useful shortcut is the Address Block or Greeting Line option in the task pane. These tools help you insert standard blocks of information with correct formatting automatically.
Previewing Your Merged Documents
Once all your merge fields are in place, it's time to see how it looks with real data.
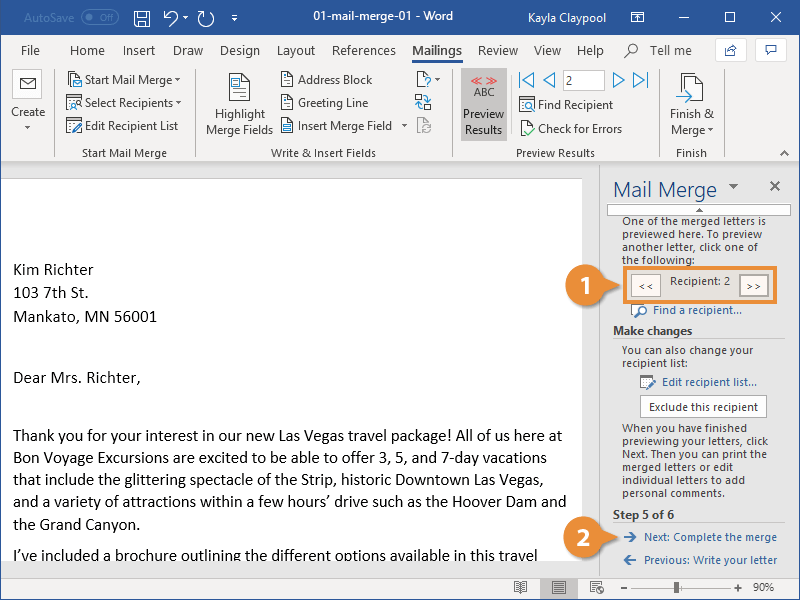
- Click Next: Preview your letters at the bottom of the task pane.
- Word will replace the merge fields with the actual data from the first record (the first row) of your data source. Your letter will now show a real name and address.
- You can use the arrow buttons (
<<and>>) in the task pane or on the Mailings tab to cycle through the different recipients and check for any formatting or data errors. This is your chance to catch mistakes before committing to the final merge.
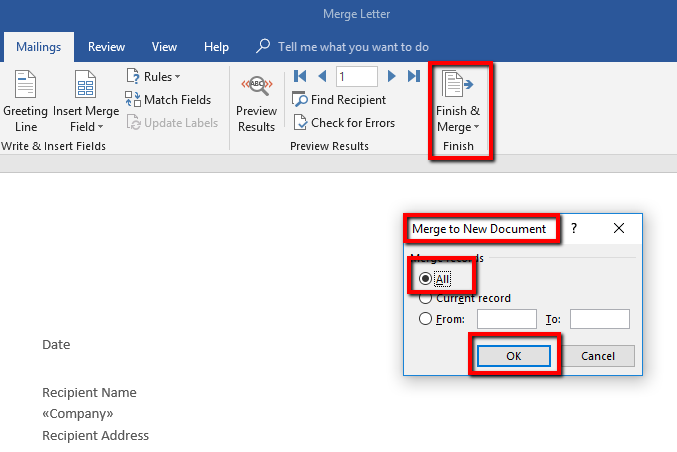
If everything looks good, click Next: Complete the merge. This takes you to the final step where you can print or edit the individual letters.
Advanced Mail Merge Techniques in Word 2010
Once you've mastered the basics, you can add more sophistication to your templates using rules. This allows for conditional content based on the data in your recipient list.
Using Rules for Conditional Content
On the Mailings tab, in the "Write & Insert Fields" group, you'll find the Rules button. This unlocks powerful customization.
The most common rule is If...Then...Else.... This allows you to insert different text based on a condition. For example, you could offer a special discount only to clients in a certain city.
- Place your cursor where you want the conditional text to appear.
- Click Rules > If...Then...Else....
- In the dialog box, set your condition. For "Field name," select City. For "Comparison," select Equal to. For "Compare to," type "New York".
- In the "Insert this text:" box, type your special offer for New York clients.
- In the "Otherwise, insert this text:" box, you can type a standard message or leave it blank.
- Click OK. Word will now automatically check the city for each recipient and insert the correct text.
Formatting Merged Data
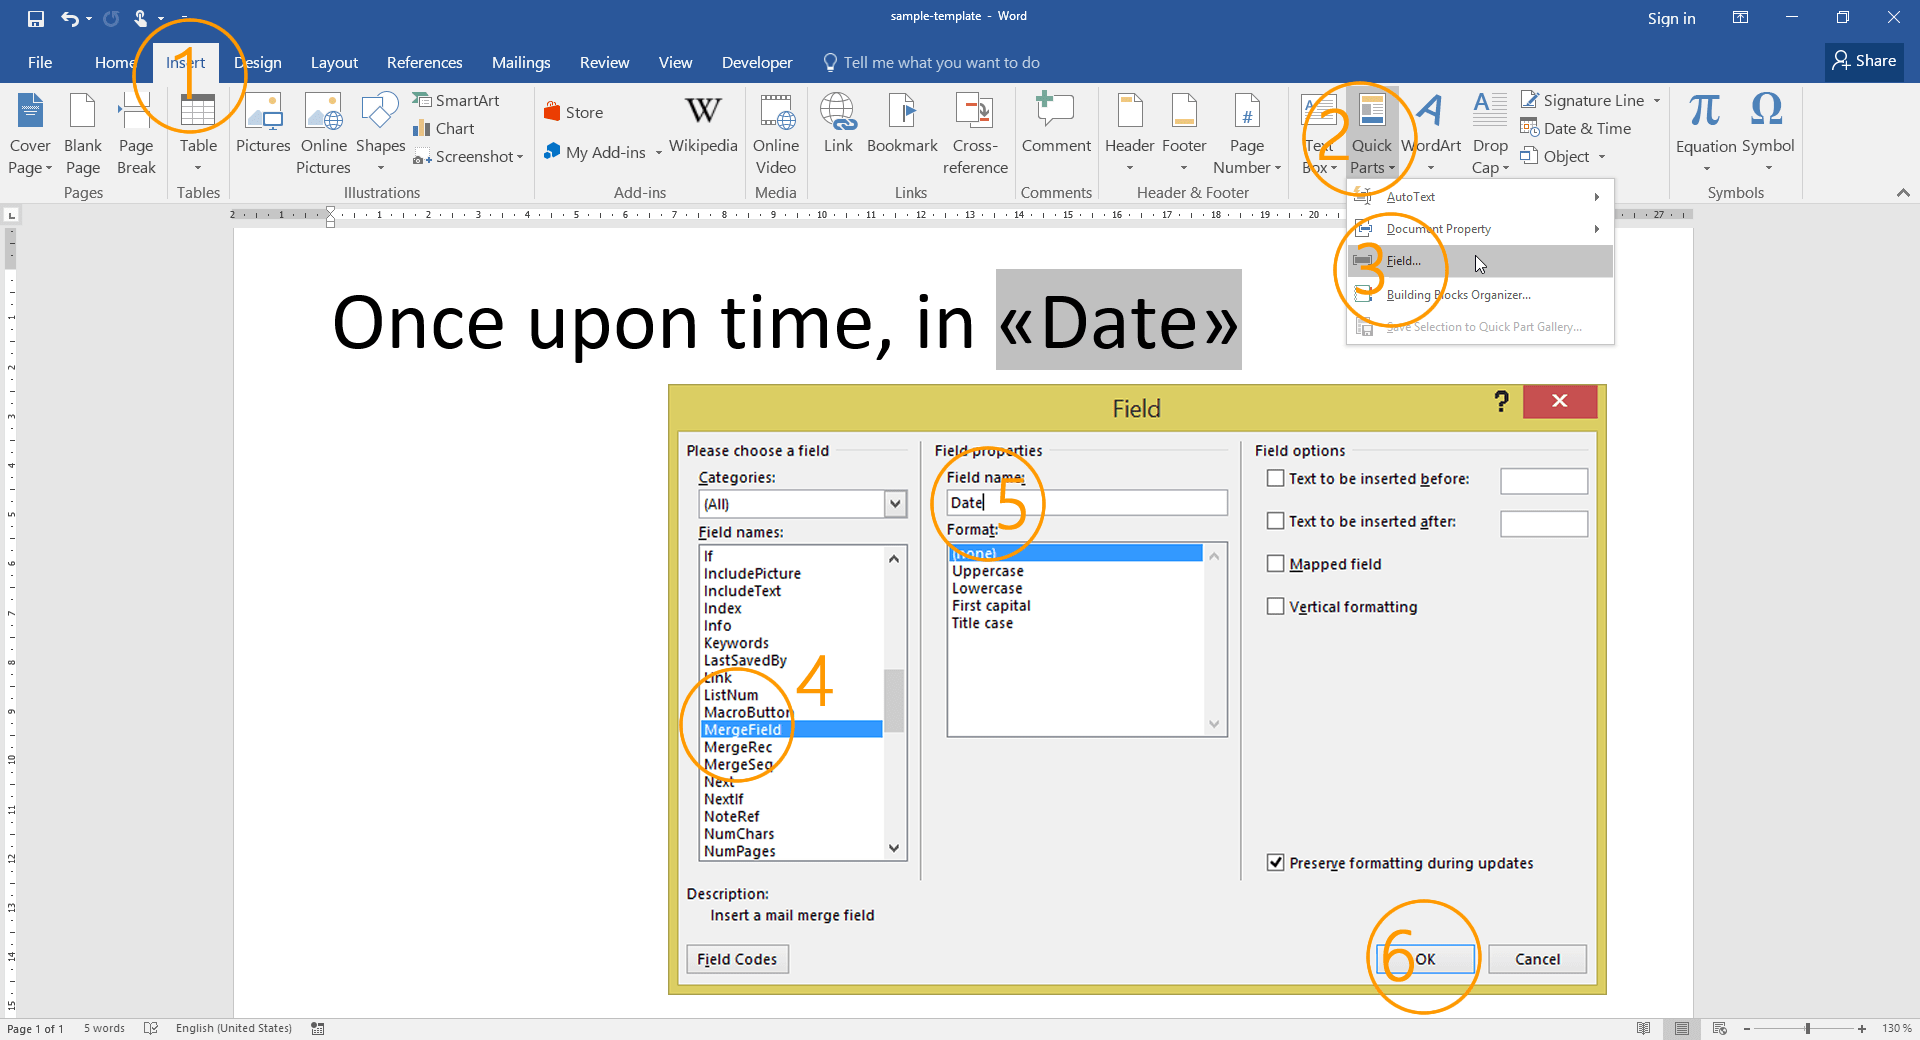
Sometimes, data from Excel, like dates or numbers, doesn't appear in Word with the desired formatting. You can fix this by editing the field code.
- Right-click on a merge field in your document (e.g.,
<<OrderDate>>). - Select Toggle Field Codes.
- You will see something like
{ MERGEFIELD OrderDate }. - To format the date, add a formatting switch. For a "Month Day, Year" format, change it to
{ MERGEFIELD OrderDate \@ "MMMM d, yyyy" }. - Right-click again and select Update Field to see the change.
Saving and Reusing Your Mail Merge Template
The true power of this process comes from saving your main document as a template for future use. This saves you from having to re-insert all the merge fields every time.
- After you have inserted all your merge fields and rules, but before you complete the final merge, go to the File menu.
- Select Save As.
- In the "Save As" dialog box, navigate to where you want to save the file.
- Give your template a descriptive name, like "Monthly Client Newsletter Template".
- Crucially, in the Save as type dropdown menu, select Word Template (*.dotx).
- Click Save.
Now, whenever you need to send a new batch of letters, you don't start with a blank document. You simply open your .dotx template file. It will open as a new, untitled document (.docx) but will retain the connection to your data source and all the merge fields. You may be prompted to connect to the data source; simply confirm it. You can then update the body text for the new month and complete the merge with a new or updated recipient list.
Common Mail Merge Problems and How to Fix Them
Even with careful preparation, you might run into issues. Here are some common problems and their solutions.
Problem: Incorrect Number or Date Formatting.
- Solution: As described in the advanced section, you need to toggle the field codes and add a formatting switch (
\@for dates,\#for numbers) to explicitly tell Word how to display the data.
- Solution: As described in the advanced section, you need to toggle the field codes and add a formatting switch (
Problem: Blank Lines Appear When an Address Field is Empty.
- Solution: Use the Address Block feature instead of inserting individual address fields. The Address Block is smart enough to suppress blank lines automatically if a field (like "Address Line 2") is empty.
Problem: All Emails or Letters are for the Same First Person.
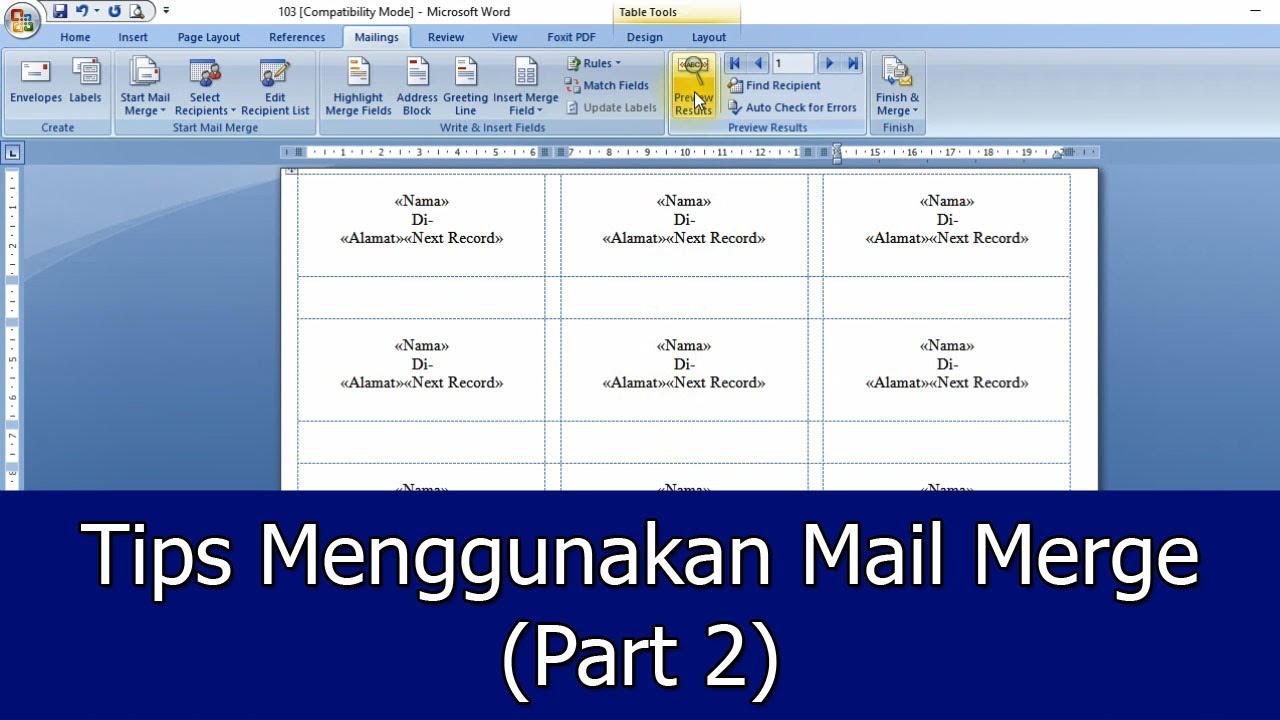
- Solution: You have likely forgotten to insert the
<<Next Record>>rule. This is mainly a problem when creating labels or directories. For standard letters, Word automatically advances to the next record. If you are manually creating a sheet of items, you must insert a<<Next Record>>rule from the Rules dropdown before each new record's merge fields (except for the very first one on the page).
- Solution: You have likely forgotten to insert the
Problem: Word Cannot Connect to the Excel Data Source.
- Solution: The most common reason is that the Excel file is still open. Close the Excel file completely and try connecting again. Also, ensure the data is on the first worksheet and that the file is not password-protected.
Conclusion
Mastering the mail merge function in Word 2010 is a skill that delivers immense value by automating the personalization of mass communications. By breaking the process down into manageable steps—preparing a clean data source, setting up the main document in Word, and carefully inserting merge fields—you can eliminate hours of manual, repetitive work. The key is to be meticulous, especially when organizing your recipient list in Excel and when previewing your results in Word before the final merge.
The real long-term benefit comes from understanding How To Create A Mail Merge Template In Word 2010 and saving it correctly as a .dotx file. This transforms a one-time task into a reusable, efficient system for all future communications. By leveraging more advanced features like conditional rules, you can elevate your documents from simple personalized letters to truly dynamic content tailored to specific segments of your audience. While the interface may be from an older version of the software, the power and utility of the mail merge feature remain as relevant and impactful as ever.
0 Response to "How To Create A Mail Merge Template In Word 2010"
Posting Komentar